A Bumblebee/Humble bee house is fun and easy to build with your kids. As a result the Humble bee queen might make a nest to breed in and make her colony.
This post shows you step-by-step how to build and gives you drawings of the parts. It is easy to make your own bumblebee house!
To build a bumblebee house you would need some piece of wood with the dimensions 19 x 148 mm (3/4″ x 6″) . Detailed drawings can be found on the bottom of the page.
In addition:
- 20 Screws 3x30mm
- Outdoor paint
- Approx 20 mm drill
- Approx 2 mm drill
- Silicone/Tec7 (optional)
- Dried grass
- Cotton (or the best: mouse nest material)
Preparation
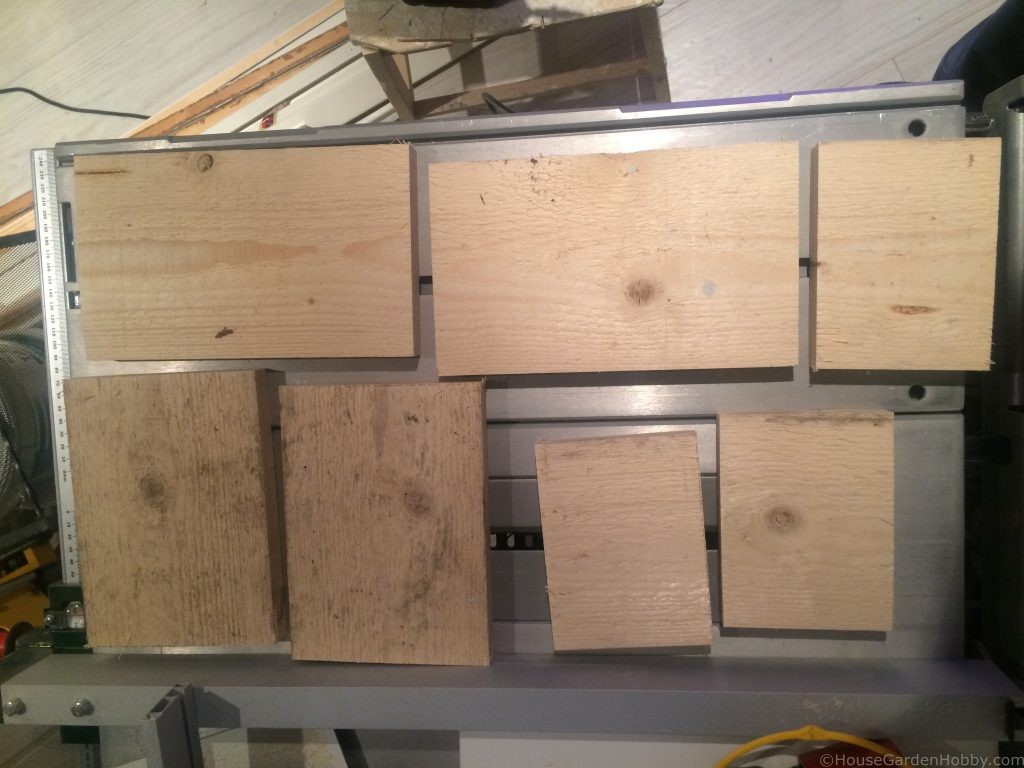
Wood pieces sizes:
- Roof: 250mm
- Bottom: 250mm
- Side walls: 200mm
- End walls: 100mm
- Ceiling: 98mm
Assembly
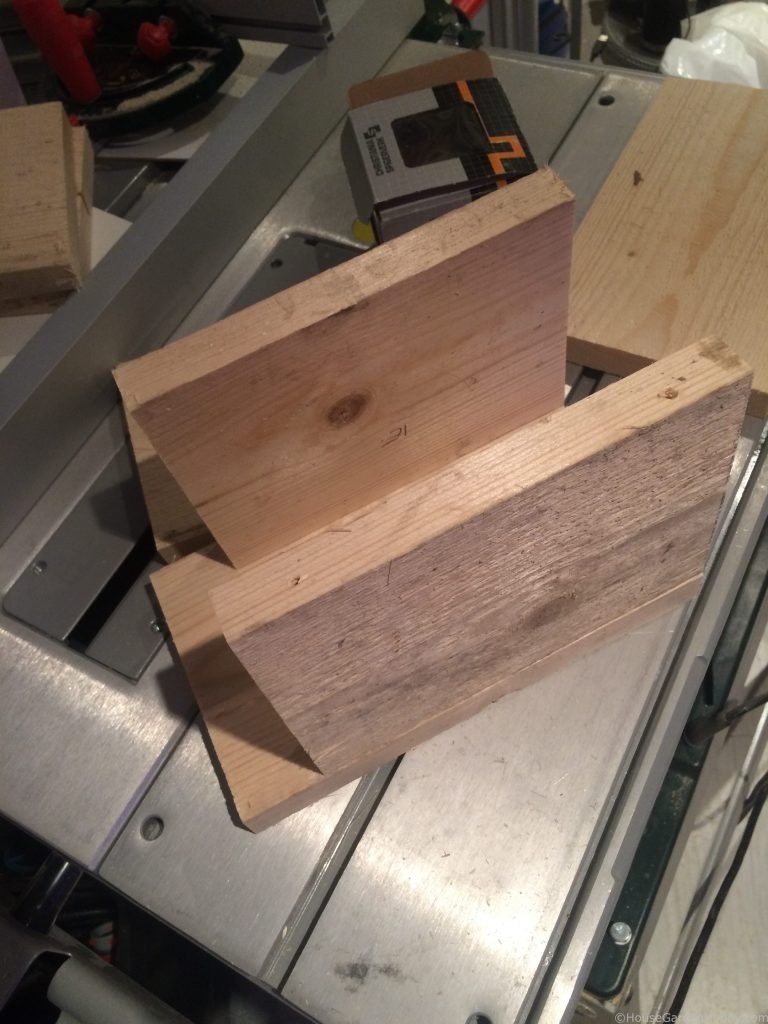
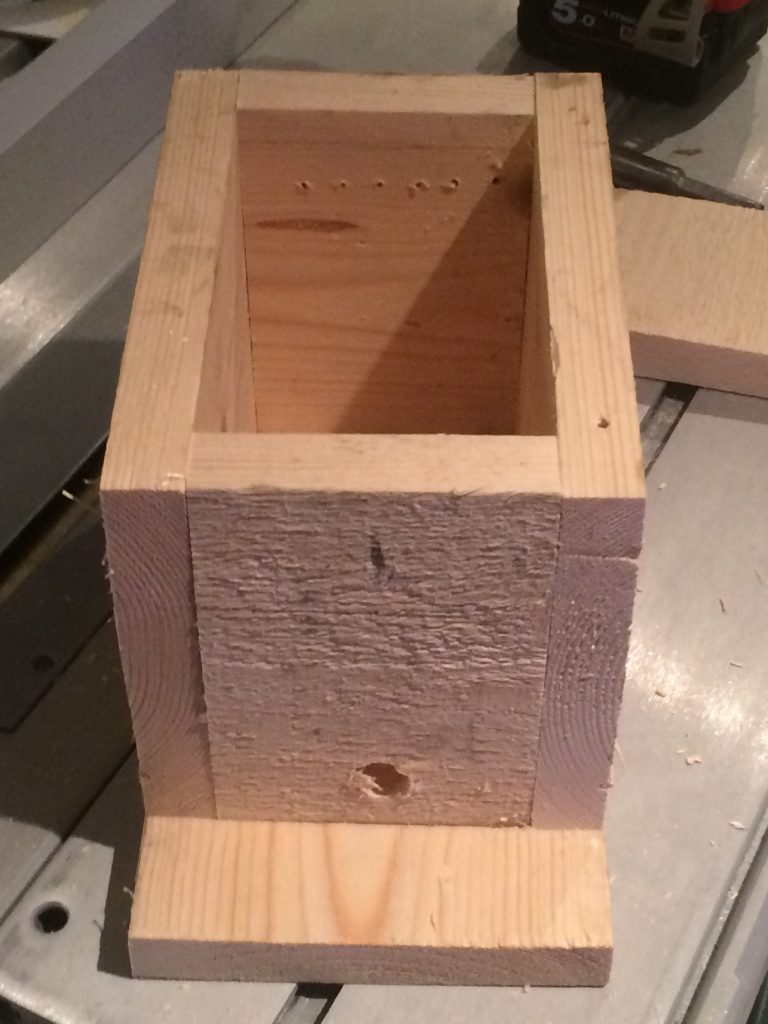
Screw the sidewalls to the bottom piece wood, and align the walls with the edge of the bottom piece. It is recommended to pre-drill the holes for the screws with a 2 mm drill. As a result, the wood will not crack.
Install the back wall and entrance wall with screws through the sidewall. The entrance hole and ventilation holes are not drilled before the walls are fixed, but this can be altered based on available equipment and personal preferences.
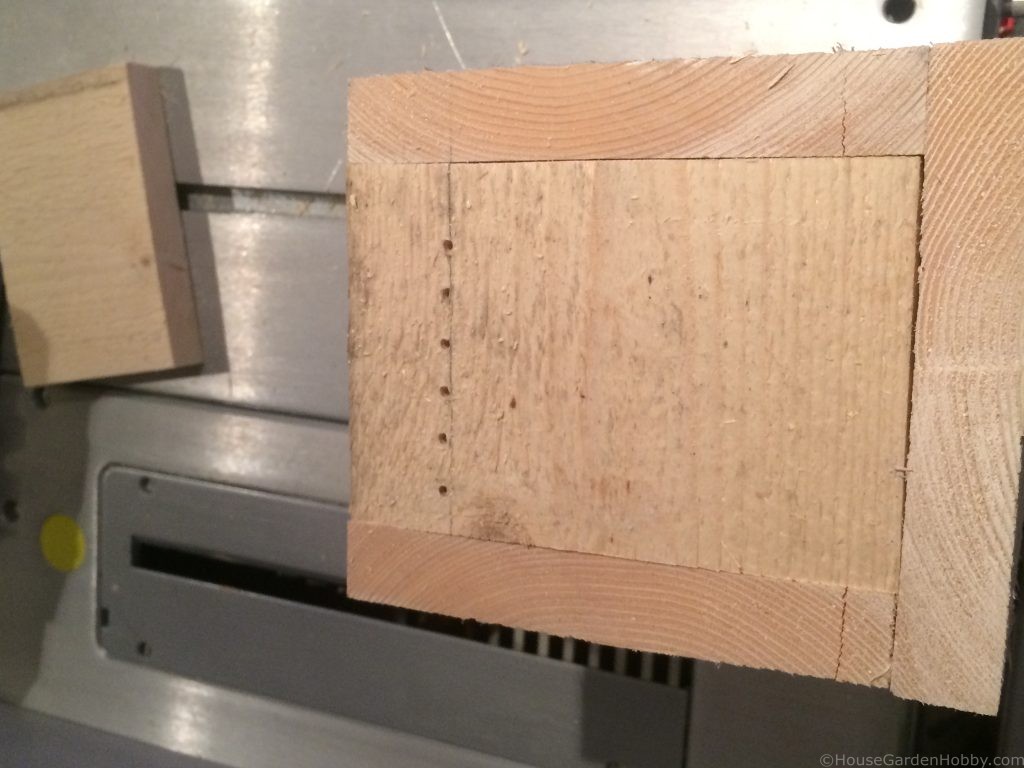
Drill the ventilation holes with a 2 – 3 mm drill. These holes will make ventilation through the nest box and will reduce the humidity in the nest. Ventilation holes are required because too high humidity may result in diseases.
Drilling the large entrance hole with a 20 mm drill. For instance, if you do not have a 20mm drill, you can drill several small holes and use a chisel. Sanding paper should be used to remove sharp edges if chisel is used.

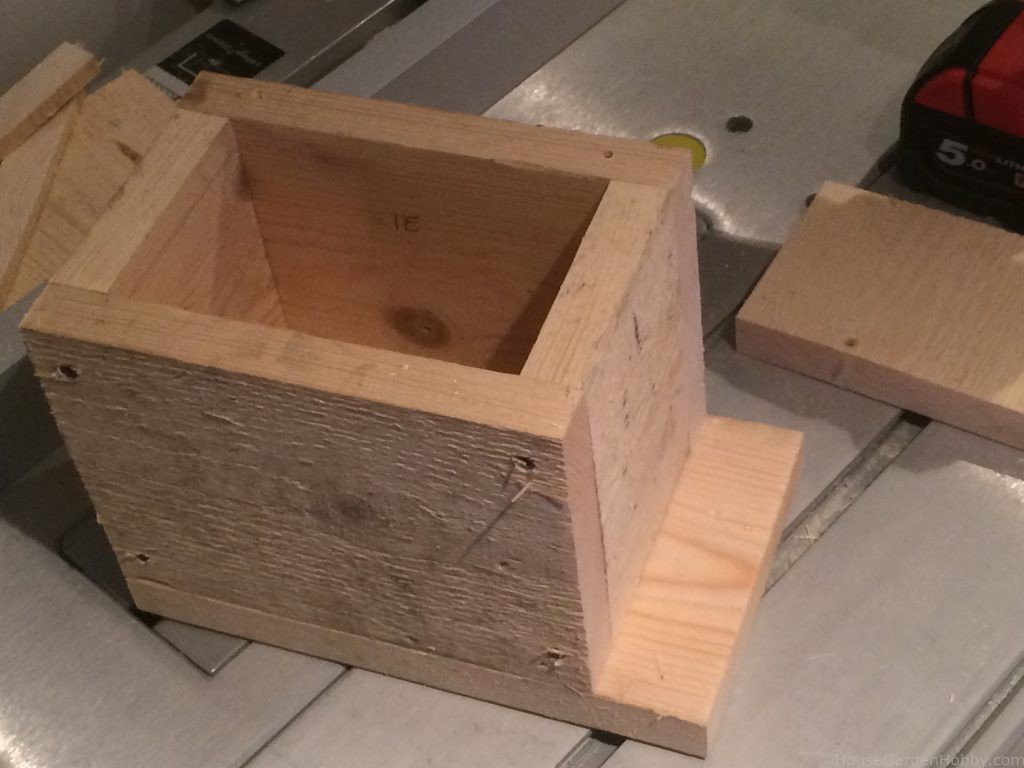
Make sure to align the ceiling piece a wall thickness from the edges. As a result of misalignment, the roof will not cover the walls.
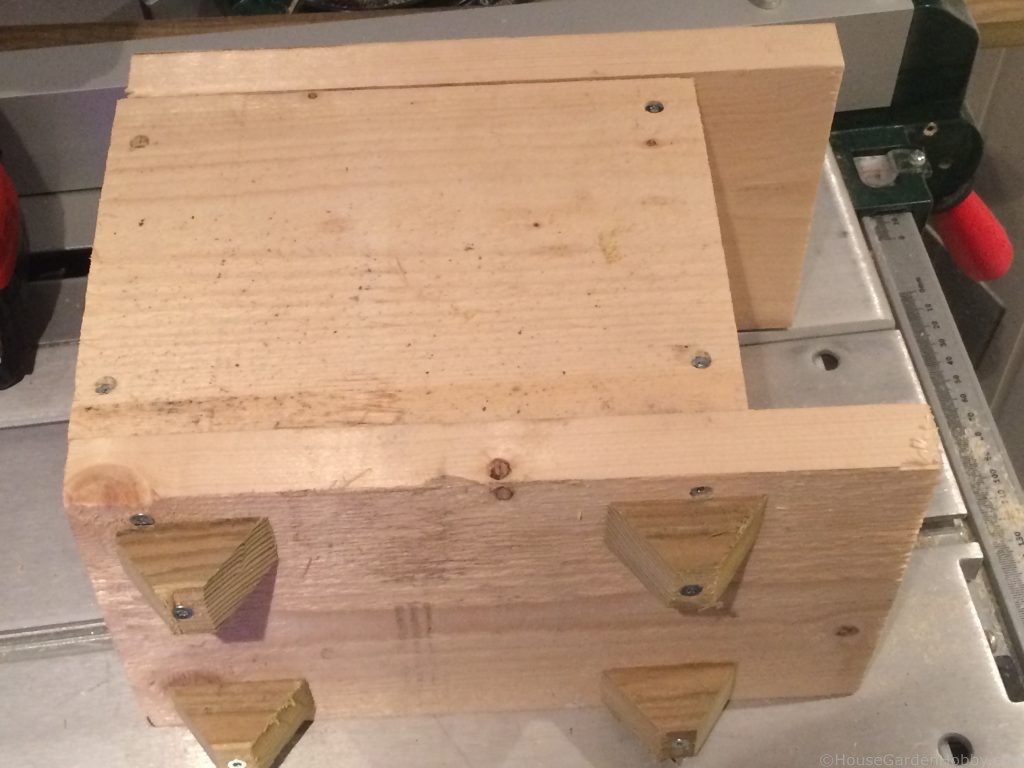
Legs are screwed to the bottom piece. These legs will keep the bumblebee nest above the ground and reduce the risk of rainwater entering the house. In addition, you should consider using pressure impregnated wood on these legs.
Painting
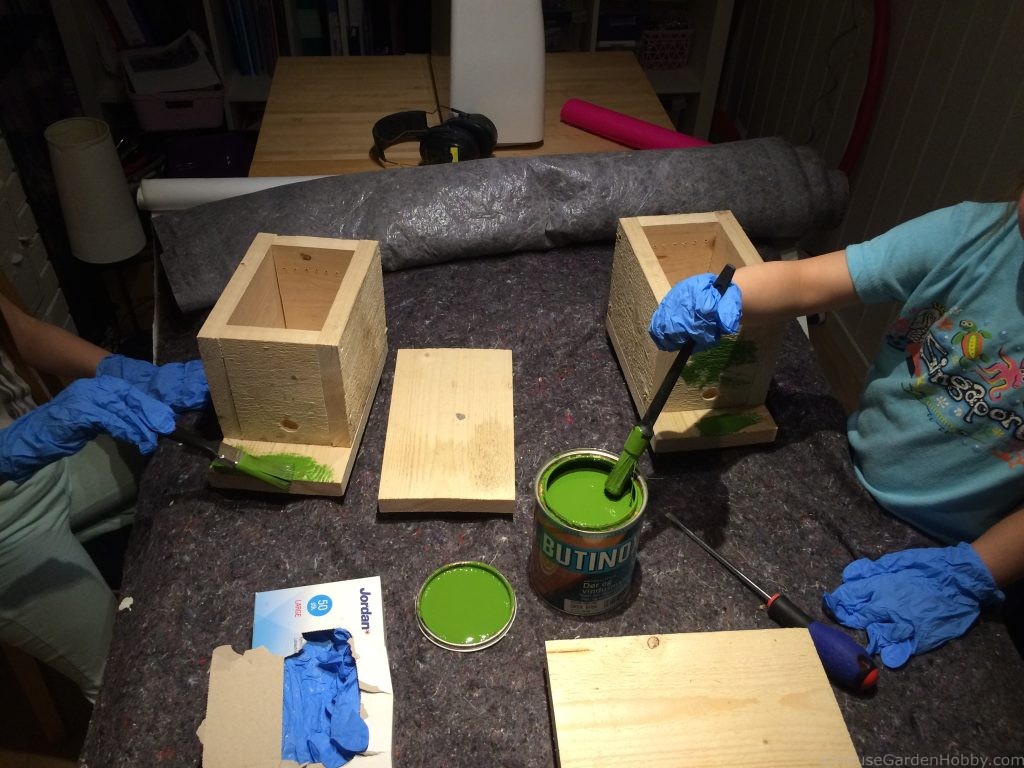
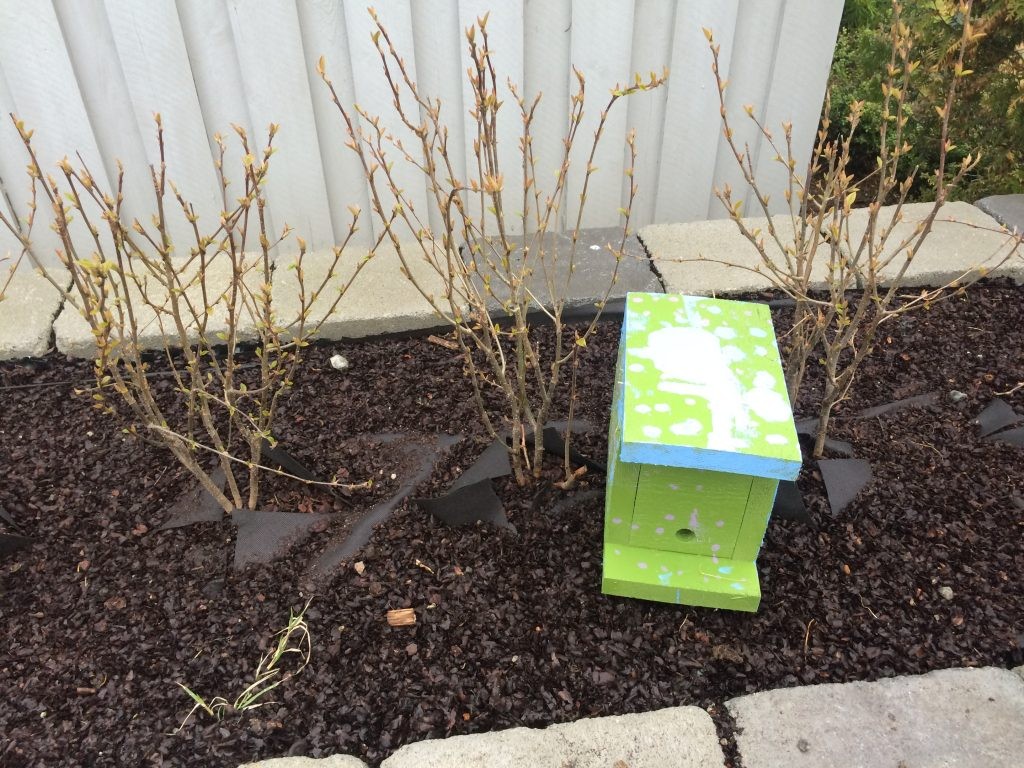
My kids taught this was the funniest part. Use outdoor paint and only paint the outside of the box. After that you can put silicone in all the gaps in the corners.
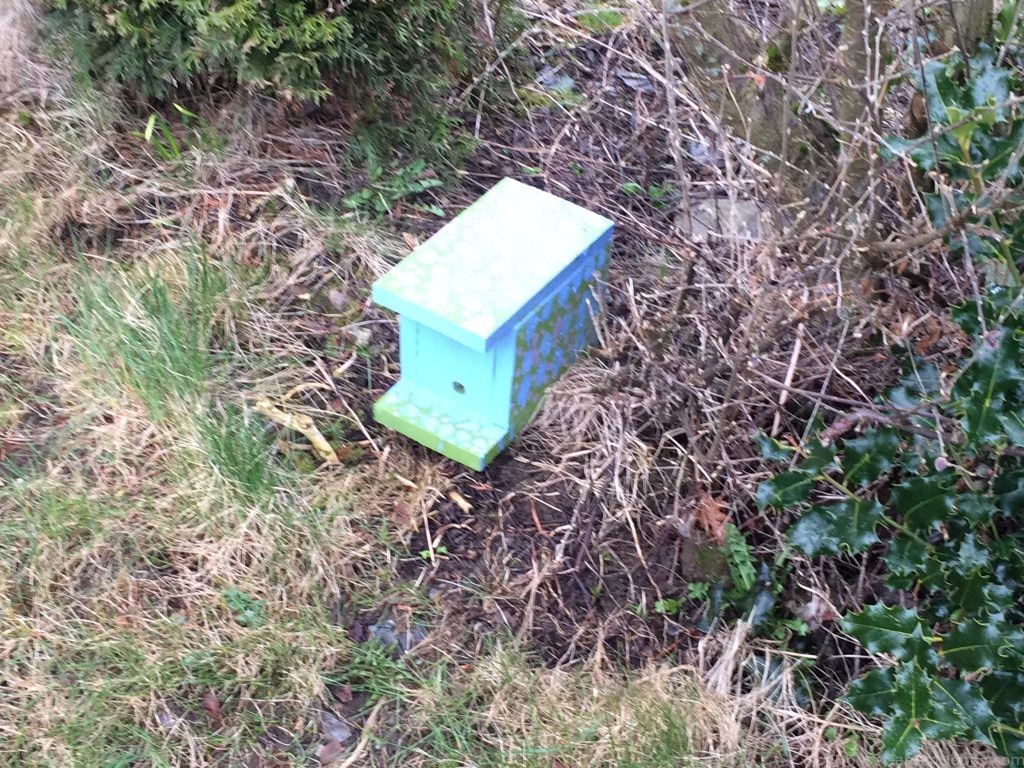
High contrast colors makes it easier for the bumblebee to find your bumblebee nest house. (says the rumors)
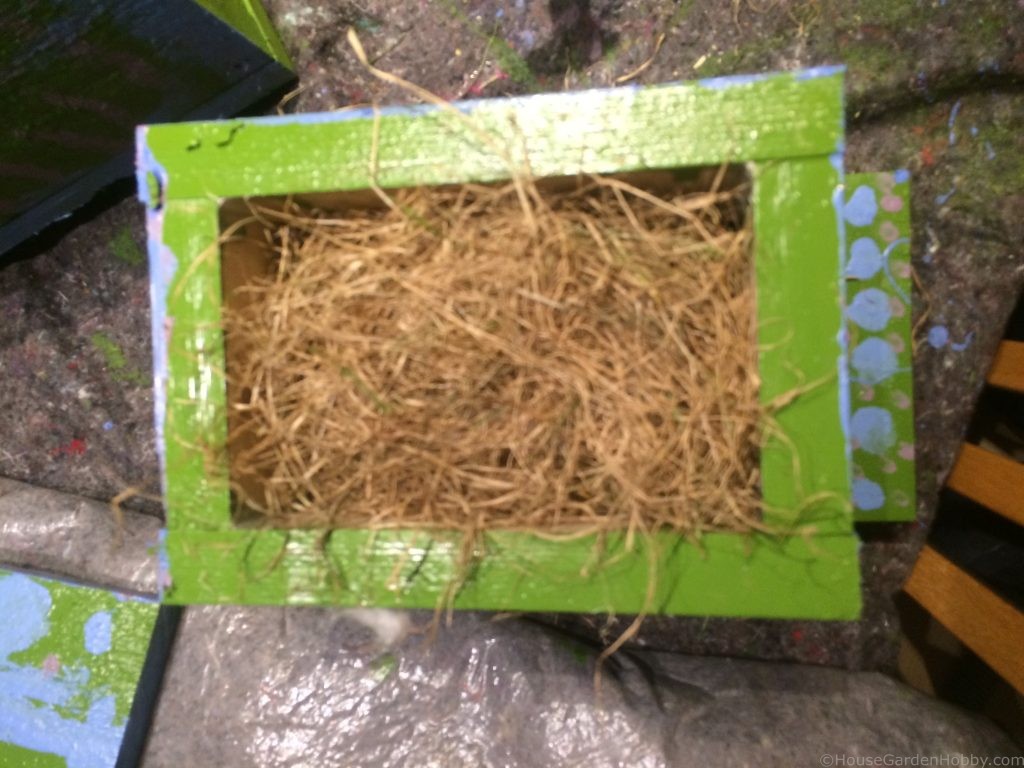
The nest
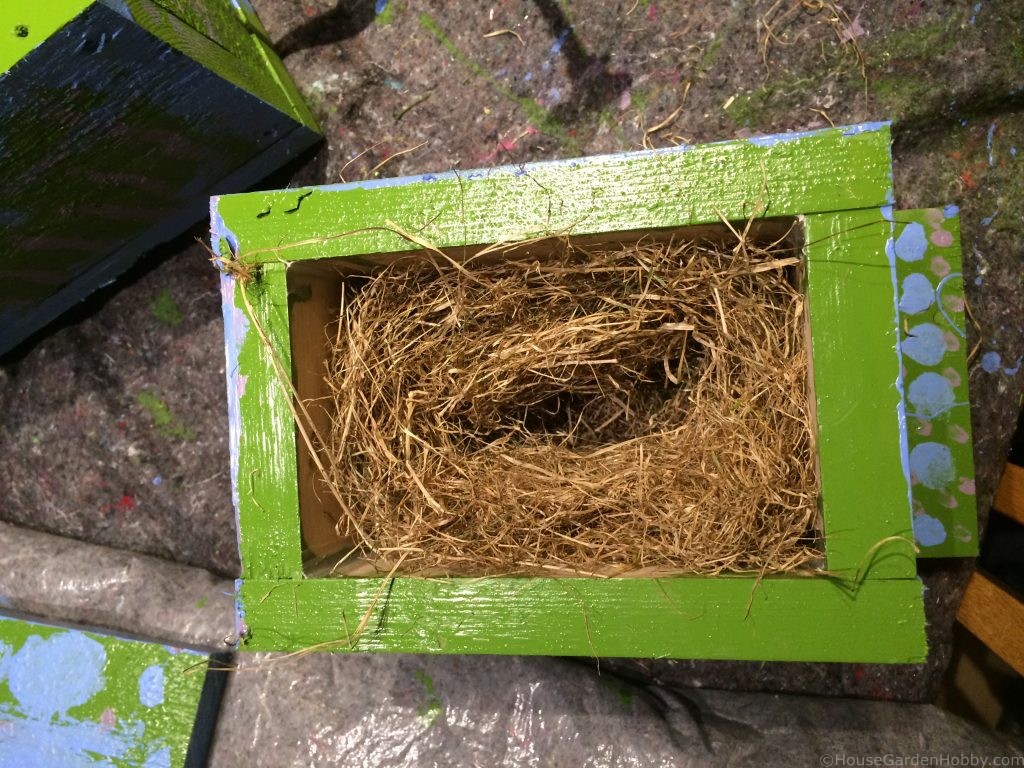
Put dried grass in the box. Secondly, make a pit in the center with the size of a fist. This grass will work as insulation and keep the temperature stable.
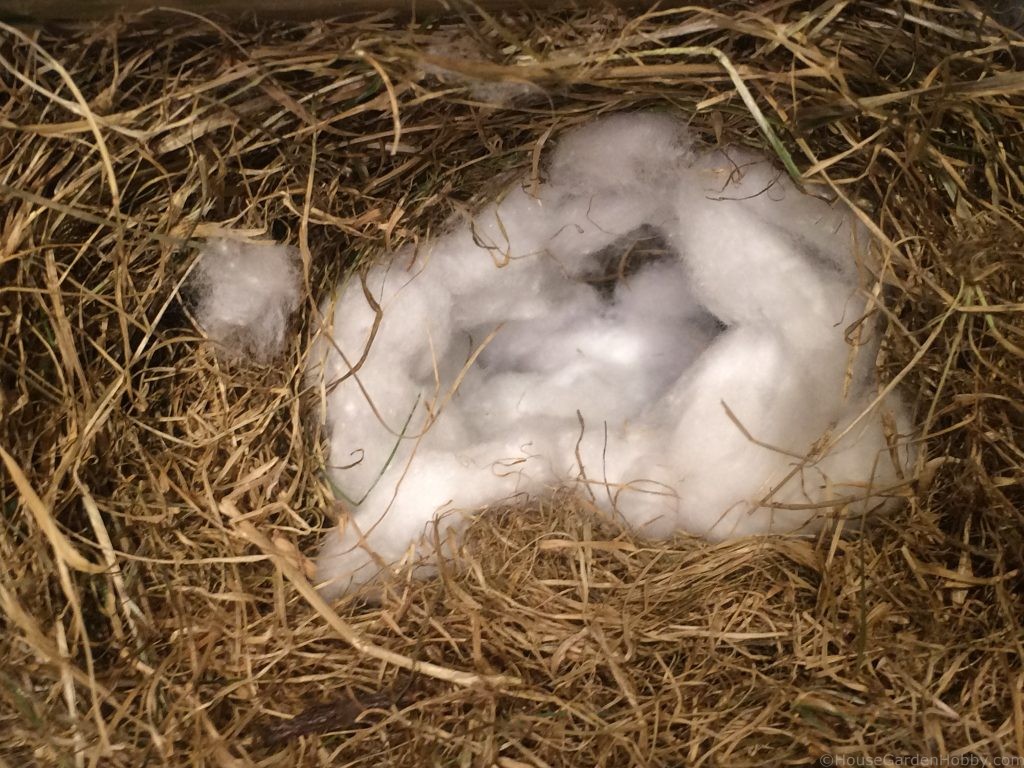
Place a thin layer of cotton in the pit. In addition, use a stick to create a tunnel from the entrance into the cotton pit.
However, if you have a mouse nest available, this will be preferable. Because the bumblebees loves using mouse nest materials.
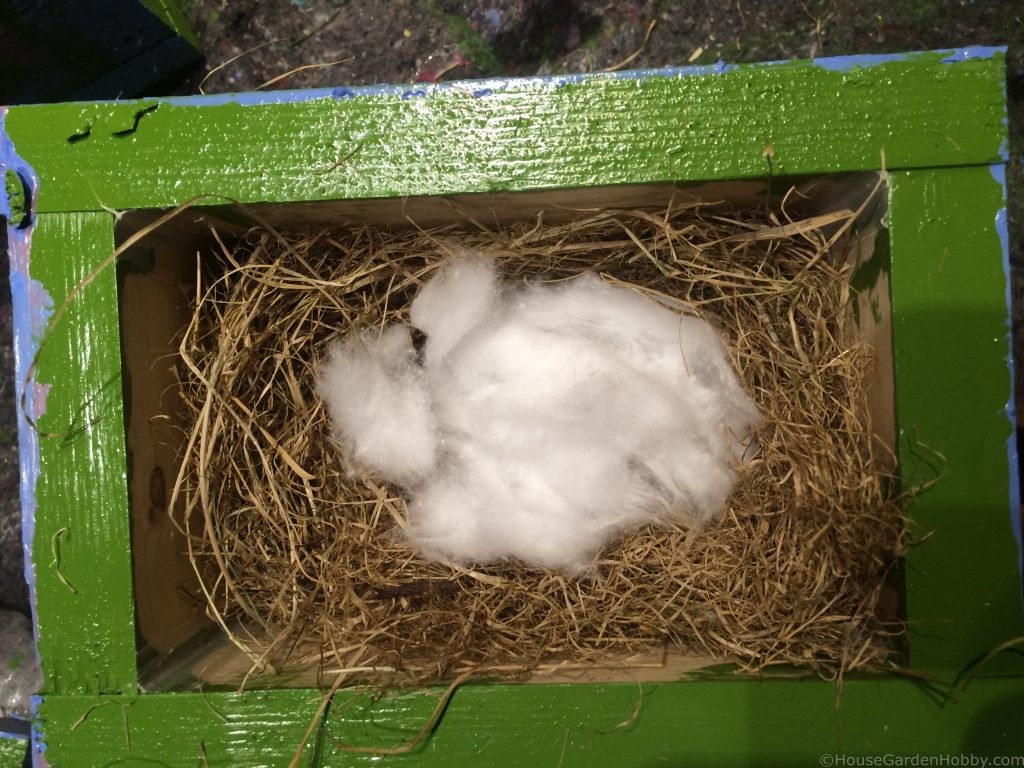
Create at thin lid of cotton and put this on top of the pit.
Fill up the remaining space with dried grass. At last, put on the roof.
Find a location
The Bumblebee House should be placed in a location where it can be undisturbed. Also, preferably with some shadow.
The last step is to be patient. Meanwhile, you can sow bumblebee friendly seeds.
Drawings

Easy Bumblebee house – Frontpage 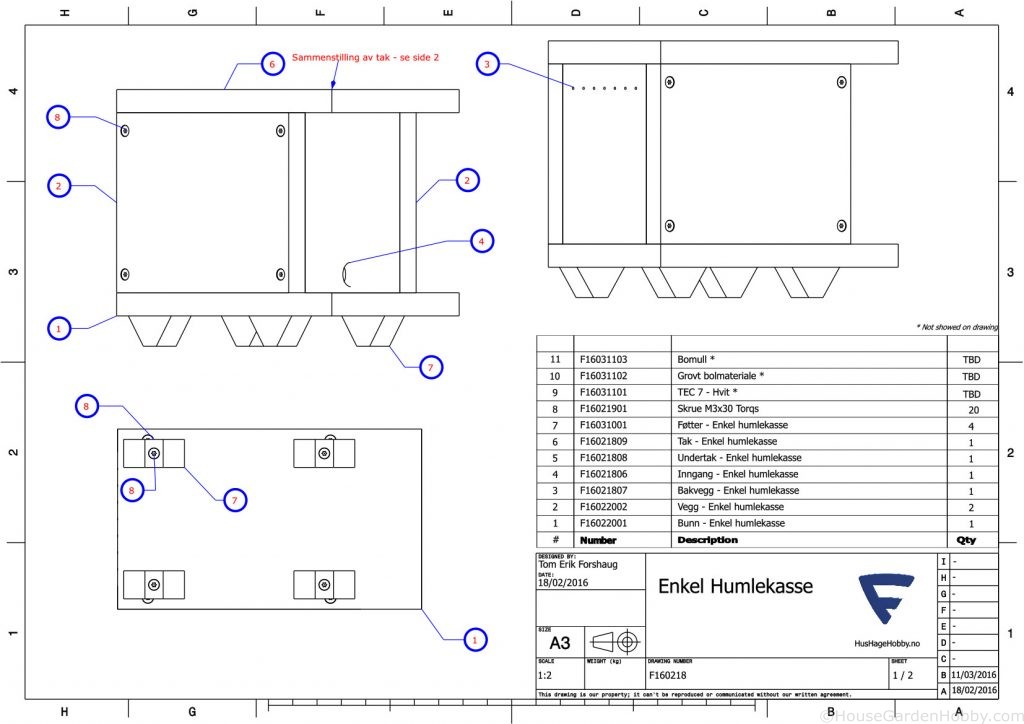
Assembly 
Roof assembly 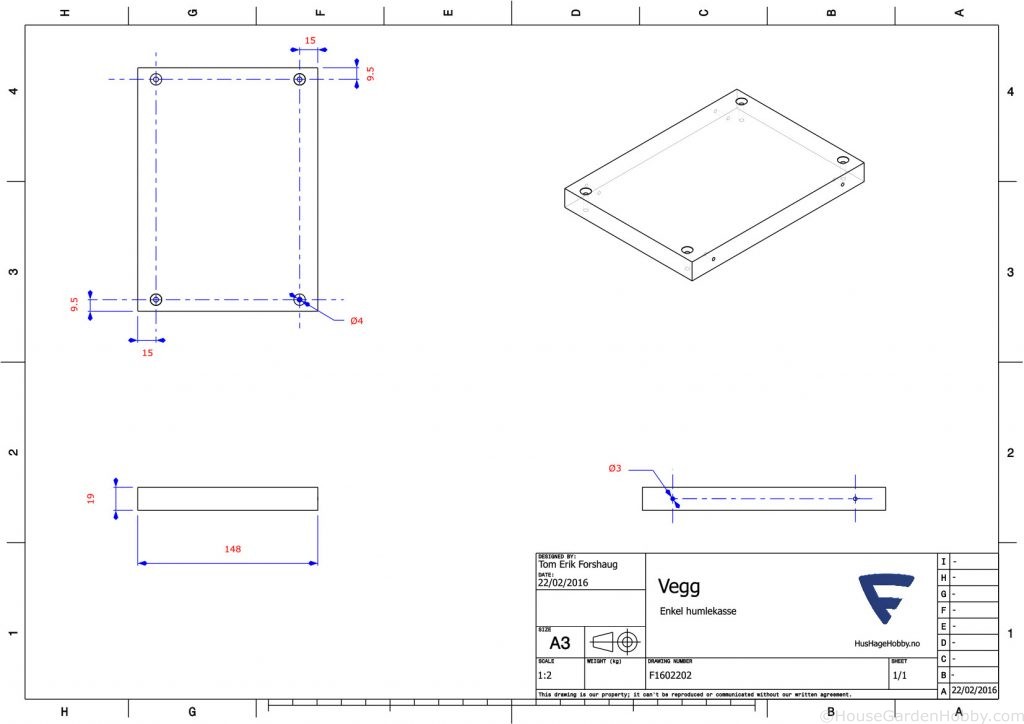
Wall 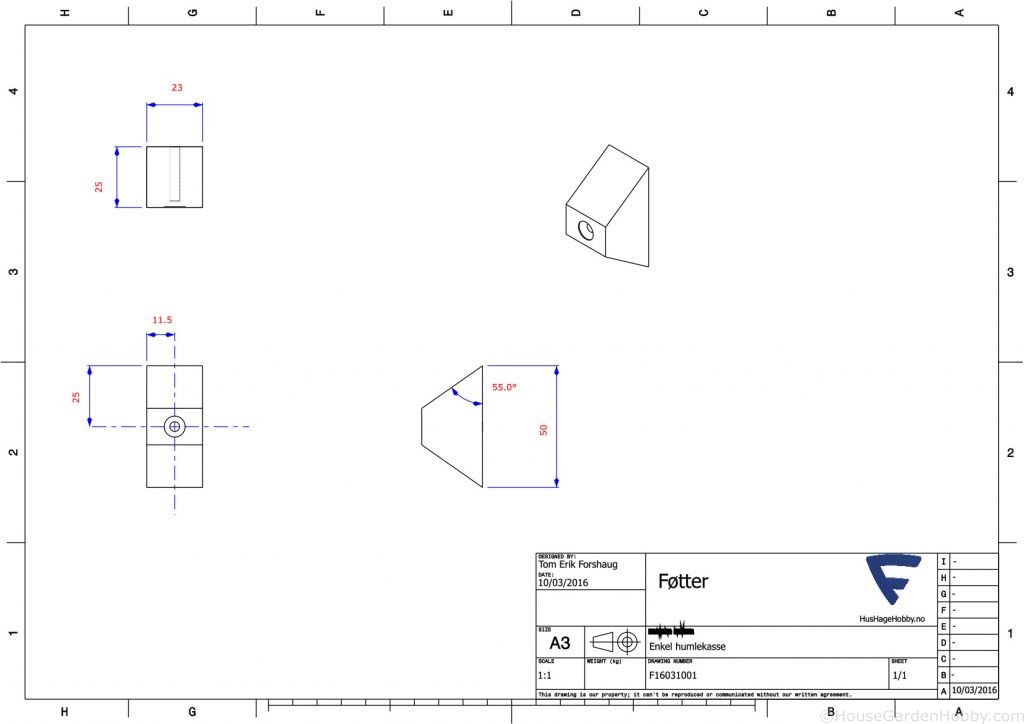
Legs 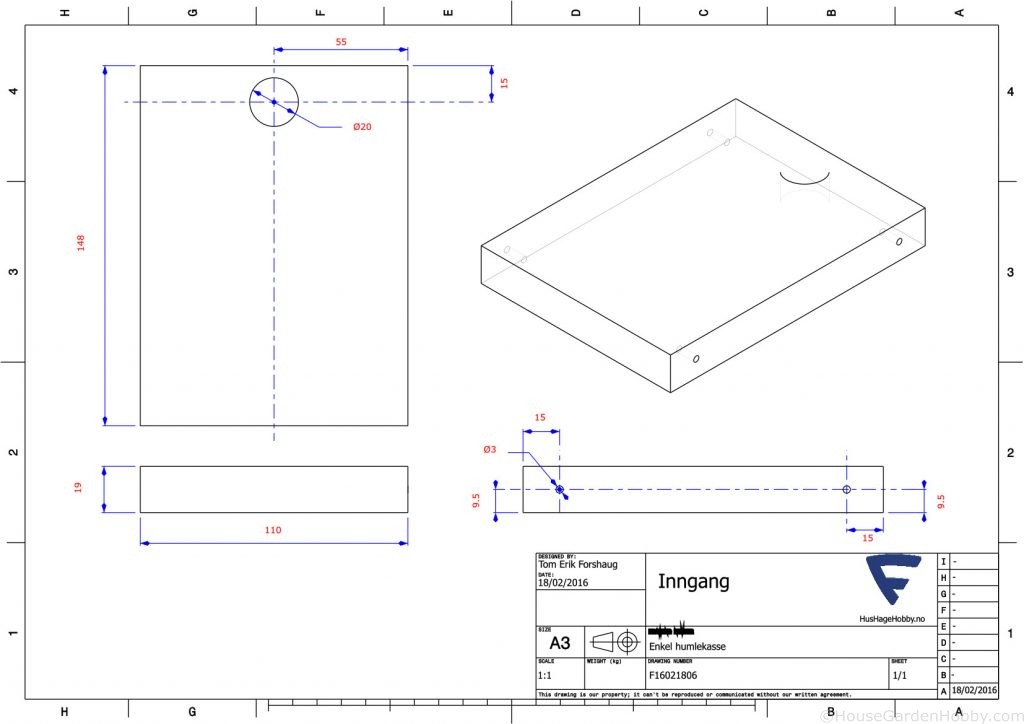
Entrance 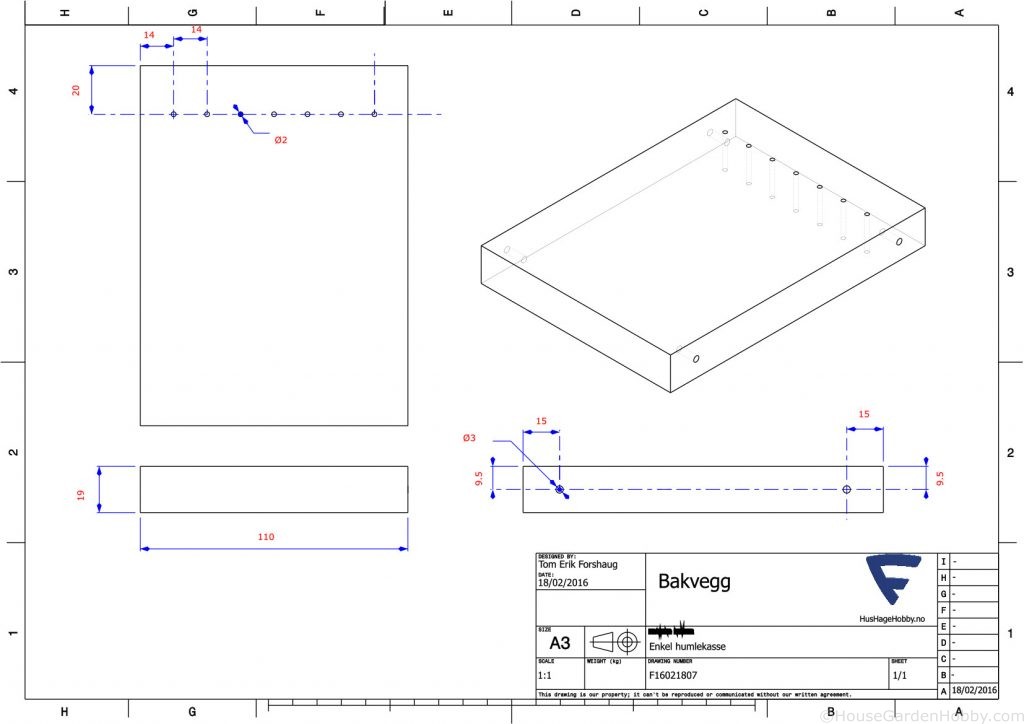
Ventilation 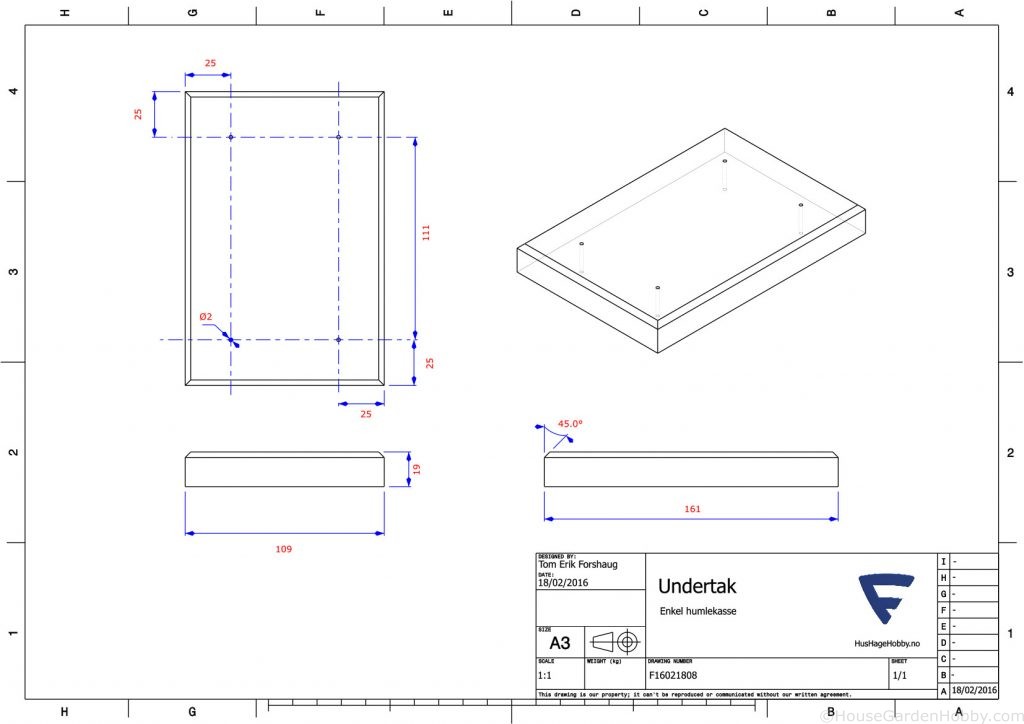
Ceiling 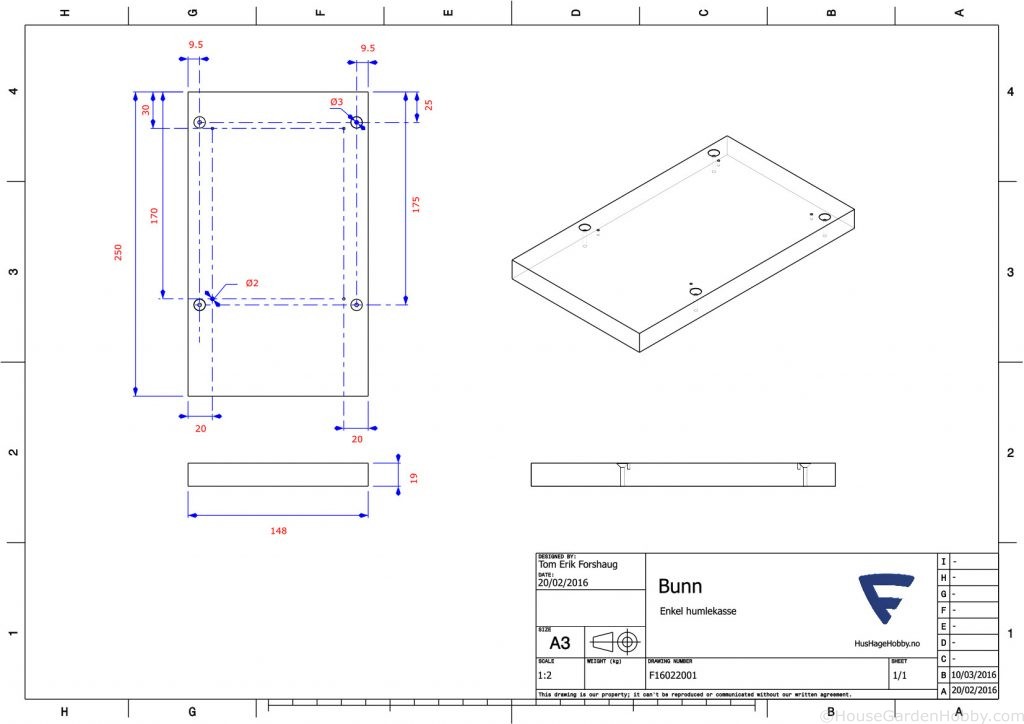
bottom
Read more about the Bumblebees on wikipedia
Please feel free to leave a comment if something is unclear or recommendation for improvement.
You also might want to build a House for Solitary bees
I love the details you presented here about the mouse. most importantly, I love how you brought out the information. This is indeed the article of a PRO. Do you mind if in quote your words on my blog if I give reference to you?